> ## Documentation Index
> Fetch the complete documentation index at: https://docs.glowstudio.ai/llms.txt
> Use this file to discover all available pages before exploring further.
# Managing Client Organizations
Effectively managing client organizations is crucial for maintaining a **structured** and **efficient** agency operation in GlowStudio. This guide will walk you through the process of creating, editing, and managing client organizations.
 ## Creating a New Organization
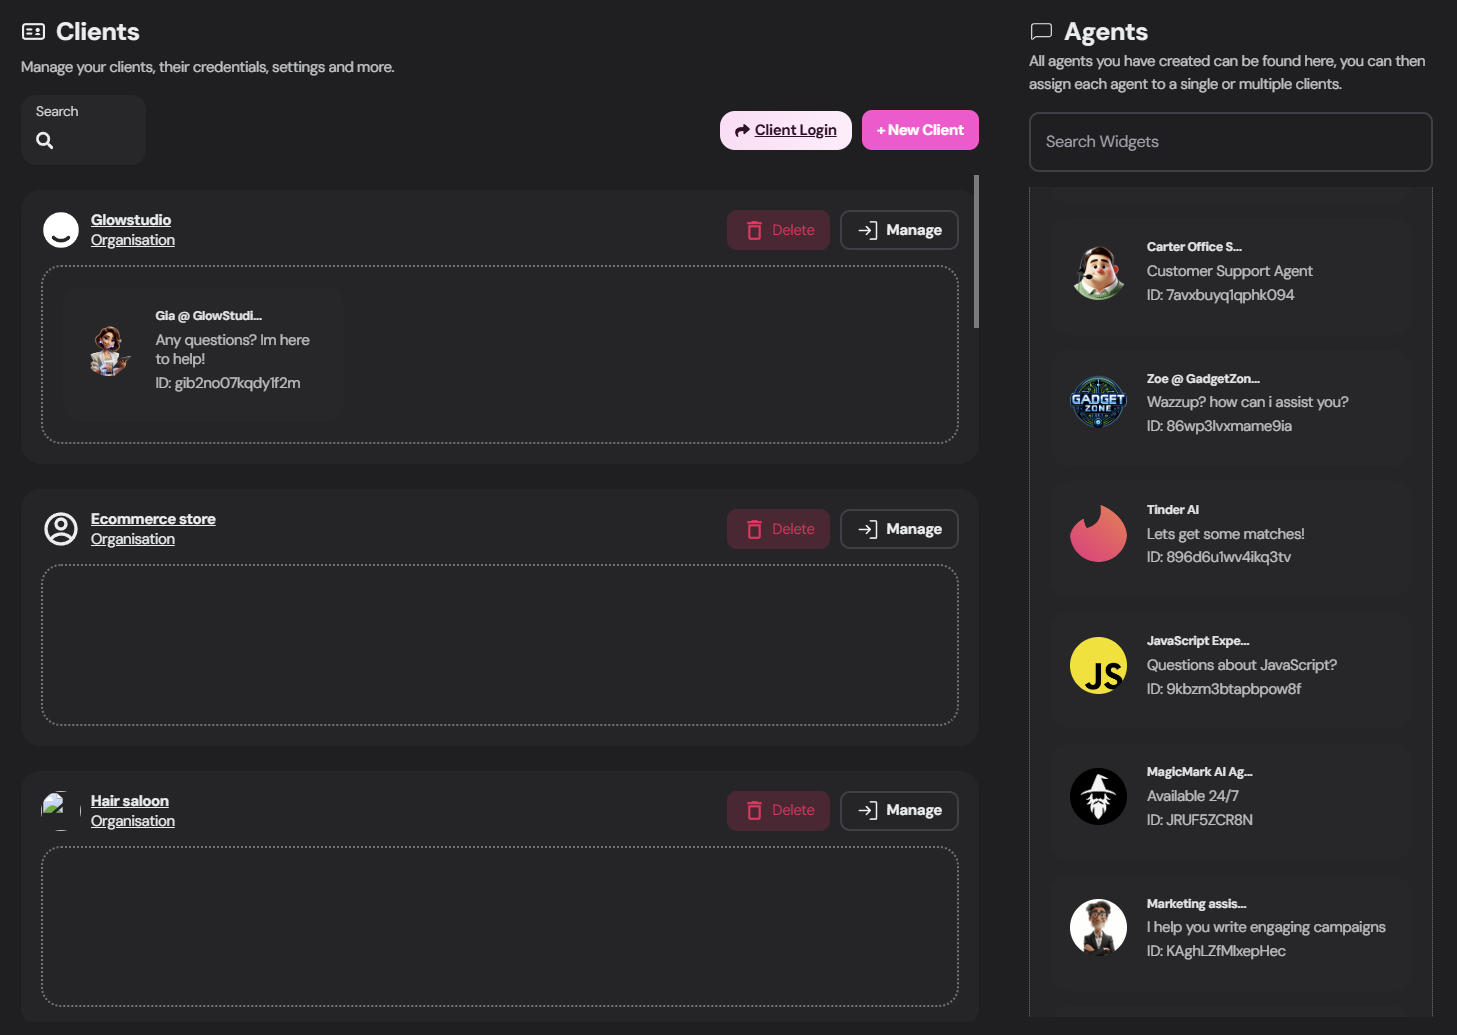
Navigate to the `Client` tab in your GlowStudio dashboard.
Click the `+ New Client` button in the upper middle section of the interface.
In the organization creation screen, provide the following information:
* **Organization Name** (Your client's business name)
* Upload or drag-and-drop a **logo/image** for the organization
## Creating a New Organization
Navigate to the `Client` tab in your GlowStudio dashboard.
Click the `+ New Client` button in the upper middle section of the interface.
In the organization creation screen, provide the following information:
* **Organization Name** (Your client's business name)
* Upload or drag-and-drop a **logo/image** for the organization
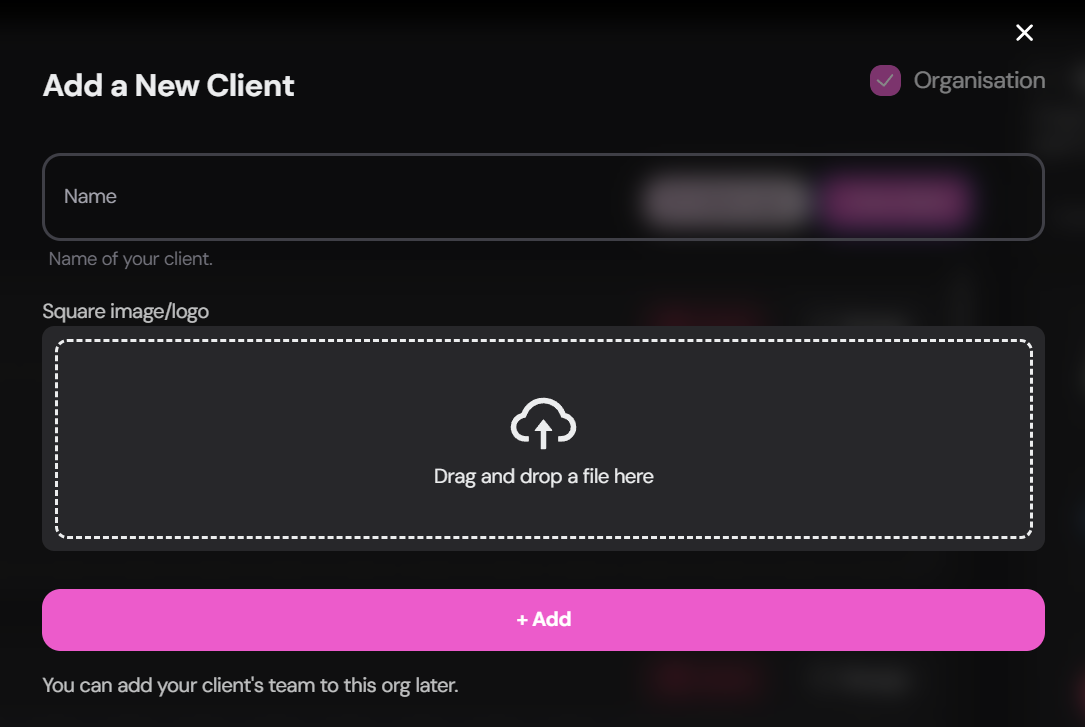 Click the `+ Add` button at the bottom of the screen to create the organization.
After creating an organization, you can customize additional settings such as dashboard language, layout, and features. See the **Configuring Organization Settings** section below for more details.
## Assigning Agents to Organizations
Once you've created an organization, you'll need to assign relevant AI agents (widgets) to it.
Find the agent list on the **right side** of the Client tab.
Use the **search bar** at the top of the agent list to find specific agents quickly.
**Click and drag** the desired agent(s) from the right side list onto the client's organization in the left side list.
You can assign **multiple agents** to a single organization. This is useful for clients who need different chatbots for various purposes or departments.
## Configuring Organization Settings
After creating an organization, you can customize various settings to tailor the experience for your clients:
Click `manage` on the organization you want to edit and then select the `Org Info` button.
In the Org Info panel, you'll find several customization options:
Select the language for the client dashboard interface using the dropdown menu. Languages supported use [ISO 639-1](https://en.wikipedia.org/wiki/List_of_ISO_639_language_codes) list.
The language setting affects onlye the dashboard, not the content of the chatbots or knowledge base.
Choose between `Vertical` and `Horizontal` navigation layouts for the client dashboard.
**Configure how client-to-human handoffs are managed:**
Toggle this to allow users to request human assistance.
When enabled, the AI will automatically detect when a user needs human assistance and initiate a handoff without requiring the user to click the handoff UI.
Hide messages that indicate when a human or AI is talking during handoffs.
Toggle `Enable Canned Responses` to allow the use of pre-written responses in client interactions.
Remember to click `Save & Close` after making changes to ensure all settings are applied to the organization.
Click the `+ Add` button at the bottom of the screen to create the organization.
After creating an organization, you can customize additional settings such as dashboard language, layout, and features. See the **Configuring Organization Settings** section below for more details.
## Assigning Agents to Organizations
Once you've created an organization, you'll need to assign relevant AI agents (widgets) to it.
Find the agent list on the **right side** of the Client tab.
Use the **search bar** at the top of the agent list to find specific agents quickly.
**Click and drag** the desired agent(s) from the right side list onto the client's organization in the left side list.
You can assign **multiple agents** to a single organization. This is useful for clients who need different chatbots for various purposes or departments.
## Configuring Organization Settings
After creating an organization, you can customize various settings to tailor the experience for your clients:
Click `manage` on the organization you want to edit and then select the `Org Info` button.
In the Org Info panel, you'll find several customization options:
Select the language for the client dashboard interface using the dropdown menu. Languages supported use [ISO 639-1](https://en.wikipedia.org/wiki/List_of_ISO_639_language_codes) list.
The language setting affects onlye the dashboard, not the content of the chatbots or knowledge base.
Choose between `Vertical` and `Horizontal` navigation layouts for the client dashboard.
**Configure how client-to-human handoffs are managed:**
Toggle this to allow users to request human assistance.
When enabled, the AI will automatically detect when a user needs human assistance and initiate a handoff without requiring the user to click the handoff UI.
Hide messages that indicate when a human or AI is talking during handoffs.
Toggle `Enable Canned Responses` to allow the use of pre-written responses in client interactions.
Remember to click `Save & Close` after making changes to ensure all settings are applied to the organization.
 ## Related Documentation
Explore these related topics to further enhance your understanding of GlowStudio's whitelabel features:
Learn how to add and manage users within client organizations.
Understand how to configure access levels for client users.
Explore the features available in the client-facing dashboard.
Master the process of onboarding clients to their new dashboard.
## Related Documentation
Explore these related topics to further enhance your understanding of GlowStudio's whitelabel features:
Learn how to add and manage users within client organizations.
Understand how to configure access levels for client users.
Explore the features available in the client-facing dashboard.
Master the process of onboarding clients to their new dashboard.